Friday, September 30, 2016

Friendship Perks

Helllooo....

Second post today (whew! It's been a busy week!), but I'm back again to share my final card for the Coffee Lovers Blog Hop!

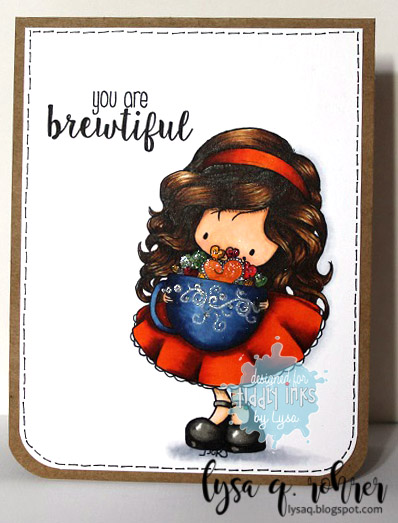
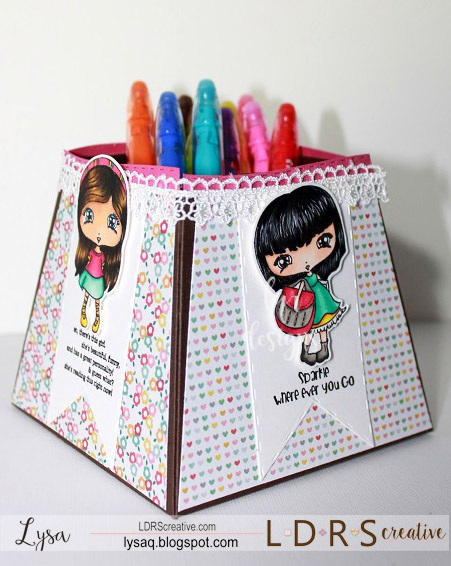
I'm also combining it with The Greeting Farm September Farm Fresh Challenge to use office supplies! I picked up this sweet Mini Remix-Brewtiful set, and just knew I had to do *something* with it! (Edited: and in the time it's taken me to write this post.. I missed the deadline! D'oh!)

Friendship Perks

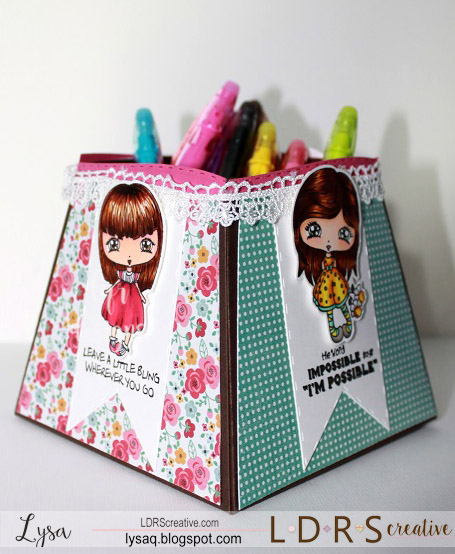
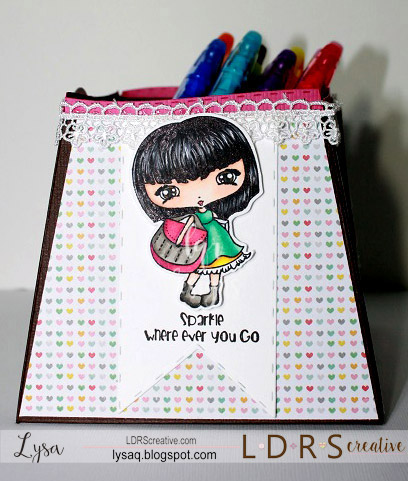
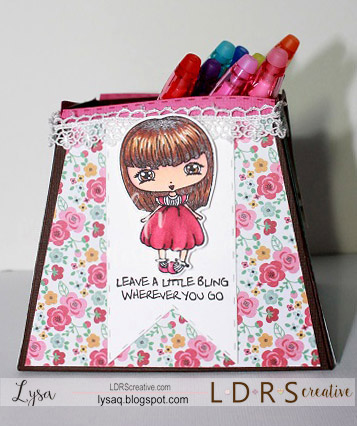
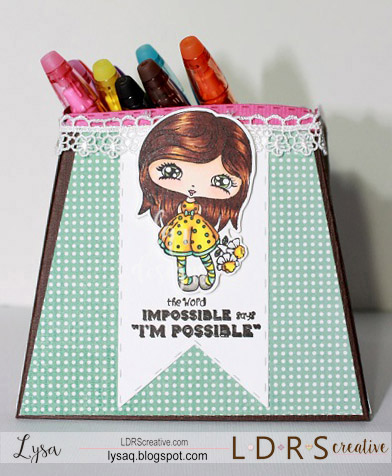
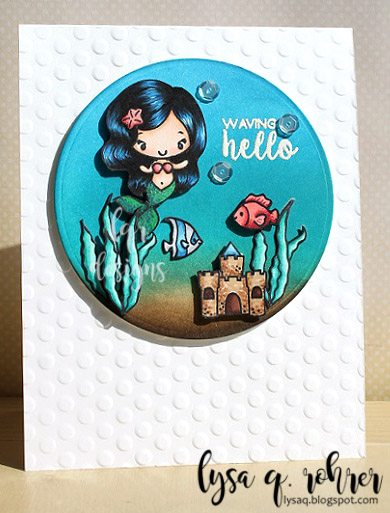
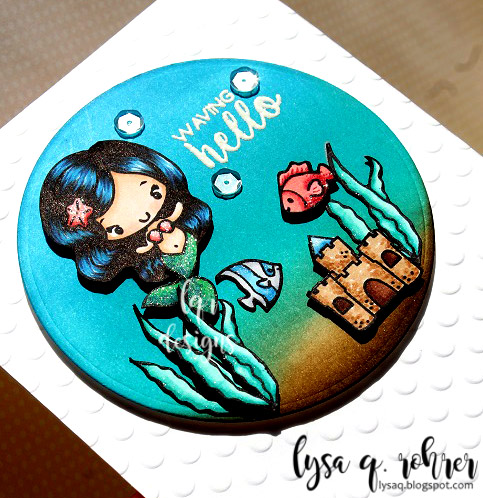
Using some elements from different stamp sets, I think I pulled off the office supply theme! Colored mini Anya & Ian in copics, fussy cut them and mounted them with foam tape onto the diecut circle, found some coordinating patterned papers and used the coffee cup embossing folder for my background.  I used Schoolhouse Backdrops from Lawn Fawn to create the sentiment strip background, and the sentiment itself is from My Favorite Things' Stay Cool. I had to dig out my notebook edge punch to finish the strip & I added a clip I had in my stash of random embellshments (I think this one was from Stampin' Up).

Copics: 
hair: (Anya) C3, 100; (Ian) E23, E25, E27, E29
clothes: (Anya) B12, B14, B16; (Ian) R17, R37, R89, B34, B37, B39
coffee cups: (Anya) R17, R37, R39; (Ian) C1, C3, E31 E33, G05. 

Happy Friday and enjoy the weekend!!

North Pole Greetings!

Hello Happy Friday!!

I'm on the LDRS Creative blog today sharing yet ANOTHER card using the sweet penguin from the North Pole stamp set- I just can't get enough of him... I haven't even inked that adorable polar bear yet!

North Pole Greetings

I stamped & masked the Santa hat on the penguin, colored it in my favorite Copic red combo (R17, R37, R89) and gave the penguin a few strokes of gray to his belly for dimension and some rosy cheeks, and fussy cut him out. I also stamped the sign from the set, added the north pole sentiment, and die cut it with the matching die.
To give my card some texture, I die cut 2 squares using Fancy Square die in felt, with one of those squares I die cut again a little hill using one of the Basic Cutting Edge border dies- tucked the north pole sign behind it and the penguin on top.
The Merry Christmas sentiment is from a special set that will be available *only* on HSN starting October 5th! Stay tuned for more info on that...
To put my card together- I layered my felt scene with a Basic Stitched flag die cut and adhered everything to my card base, with this fun festive patterned paper (from Hobby Lobby).
Thanks for stopping by... I'll be back shortly with another share! :) 

Thursday, September 29, 2016

You're BREW-tiful!

2nd post today... I just had to get another card in for the Coffee Lovers Blog hop! How could I not with it being National Coffee Day??

This time I used one of the newer Molly images from Tiddly Inks, Molly's Cup of Love!

Brew-tiful

I just love her giant mug of sparkly hearts! I colored her in some warm fall colors (& I think I found a new favorite orange combination!) I love keeping cards with these Tiddly Inks girls clean and simple so they get all the focus... I added a sentiment from The Greeting Farm's Mini-Remix Brewtiful stamp set. Completed my card with some Spectrum Noir sparkle pen and a border of faux stitching.

Copics:
skin: E000, E00, E11, E21, R01
hair: E31, E33, E35, E37, E29
dress/headband: YR04, YR07, E09, E18
mug: B34, B37, B39; hearts: YG63, YR04, BG72; R37

Thanks for stopping by! I'm off to enjoy my coffee!

Chilly Daze

Hello!  I'm over on the Passionate Paper Creations blog today sharing yet another stamp from the new LDRS Creative release... I'm having so much fun with these stamps & dies!

For my card today, I used Chilly Daze, just love her wreath of fall leaves on her head...

BeYOUtiful

I colored her with Copic markers, die cut the image using the Fancy Rectangle and Layers die set. I also die cut some coordinating papers using the same size die and matted them off center for more interest against the (Picnic Quilt) embossed background. The sentiment is from the Summer Fun and die cut from a tag in the same rectangle die set. I found the leaf sequin in my stash and added a few more for some extra sparkle! 

Copics
skin: E000, E00, E11, E21, R20
eyes: G21, G24
hair: E44, E47, E49, YR23
clothes: B24, B26, B29, R46, R59, R89, W1, W3, W5; (shimmer on scarf- Spectrum Noir sparkle clear pen.) 
leaves: BG72. BG75, G94, G99, R39, Y02, Y15, Y17, YG03, YG17, YR14, YR16
background; C0, C1, C3, 0

Thanks so much for stopping by.. be back soon with more to share! 

Tuesday, September 27, 2016

Day 2 LDRS Creative Release

Hello!

I'm back again to share another card I created for day 2 of the LDRS Creative release!

Today, I used the North Pole stamp set along with Creative Basics dies. Check out all the new *stamps* and *dies*...

Penguin Joy

I used the sweet little penguin from the set, stamped it twice and added some eyelashes to make one a girl penguin ;)!

This stamp set also comes with the matching die set, which I also used to die cut the penguin couple... I lined up the die with the first penguin and taped it down, ran it through my Big Shot- by placing it to the edge of the cutting plates so the point where the penguin wings met hangs off the edge and doesn't get cut, then did the same thing for the other penguin, and carefully using my x-acto blade finished off the cuts.  I gave them a few strokes of gray copic around their bellies and some rosy cheeks. I die cut a few Basic Pierced Ovals and layered them to look like snowy hills and die cut them all together using the Fancy Rectangles & Layers die, mounted it on some coordinating patterned paper and washi tape background, added some bakers twine a few sparkly accents and called it done!

Copics: 
bellies: C00, C1, C3, 0
cheeks: R00

Don't forget to go to the LDRS Creative blog for more fabulous inspiration and chances to win! AND for even more chances to win- check out the Passionate Paper Creations & Friends Facebook group!

There's even a sale going on... 20% off the ENTIRE SHOP... this week only!!

Monday, September 26, 2016

LDRS Creative *NEW* Release!

Hello!

Super excited to share today... there's a NEW release happening over at LDRS Creative! There are NINE new products and everything is available in the shop right now!!


For my first card (come back tomorrow to see more!) I used this adorable Nesting stamp.

Nesting

After coloring with copics, I fussy cut her out, die cut a few Basic Stitched Flags, and used the NEW Peaceful Dove Edge die as an embosser to create my background (I added a few strokes of copic to make it stand out a bit more).  The sentiment is also from a new Christmas stamp set to be released soon- They're going to be featured on the Home Shopping Network on October 5th, and *only* available there... stay tuned for more details!

Copics:
skin: E000, E00, E11, E21, R20
hair: C3, 100
nest/birds: E53, E55, E57, YG17; B05, G05, B37; R37
scarf/sweater: R46, R59, R89, Y17, Y26, Y28; W3, W5, W7

Be sure to head over the LDRS Creative blog, and leave a comment for your chance to win a $25 gift certificate to the shop and to see some seriously awesome inspiration from the rest of my teammates!

AND we're also celebrating the release over on the Passionate Paper Creations & Friends Facebook group- so be sure to join (if you're not already a member) and play along! I hear there are more prizes to be won there too!

Thanks for stopping by!

Sunday, September 25, 2016

Coffee & Donuts

I'm back again with my second & last (sniff sniff) post as a guest designer over at Butterfly Reflections, Ink!

I decided with the Coffee Lovers Blog hop going on- I thought it would be appropriate to make another coffee card ;)  (& since Butterfly Reflections, Ink is one of the many sponsors for the hop!)

On to my card...

I used the sweet Big Bold Brew & Say Yes to Donuts stamp sets from Neat & Tangled... I had been eyeing them forever and finally got my hands on them!

Coffee & Donuts

I colored them with my trusty copics, fussy cut them out, added some foam tape and stuck them on some white cardstock and fussy cut them out again for some extra dimension. I dug through my stash of patterned papers and found these fall-ish colors and arranged them randomly to fit in the bottom corner. Added the cute coffee & donuts kids, the sweet sentiment, stickles for the rainbow donut sprinkles, and finished it off with faux white stitching to tie everything together.

Copics: 
skin: E000, E00, E21, R01
hair (boy): E44, E47, E49; (girl): E25, E27, E29
mug: B02, B12, B14, B16
coffee: E70, E74, E77
pants: W3, W5
shoes: N5. N7
donut: E31, E33, E35; R81, R83, R85
bow/pants: R17, R37, R89

Big thanks again to Vanessa and the Butterfly Reflections, Ink crew for having me apart of the team this month!  Hope to join them again sometime... Thanks for spending a bit of your Sunday with me!

Saturday, September 24, 2016

Scarecrow Coffee

Happy Saturday!

It's that time of year again... time for another Coffee Lovers Blog Hop!


The first day of Fall rolled around a few days ago, and it actually feels like it around here... (aka it's no longer 100*F degrees!)

I got this idea in my head and couldn't let it go til I had it down on a card...

Scarecrow Coffee

I mean... scarecrows need coffee too, right? All that hard work they do guarding the crops and you have to think that they're big pumpkin spice latte fans!

I pulled out this adorable Happy Harvest stamp set and went to town stamping the background with pumpkins- at first I was going to leave them as is in the Versamark ink, but I added a few swipes of copics to add more interest.  Mr. Scarecrow just had to have a big coffee cup and the one from the Love You a Latte set was a perfect fit! After masking the scarecrow, I stamped (& double stamped) a few stalks of corn using the Hero Arts green Ombre ink, die cut it using the Stitched Circle tags, and added a couple of pumpkins to finish off my little fall scene.

Hoping to get a few more cards in for the hop this week!

Copics:
scarecrow face: E13, E31, E35, R20, Y32
clothes: B91, B93, B95, BG13, BG72, BG75
hat: E31, E34, E35; BG13, BG72, BG75
straw: E31, Y35, Y38
pumpkins: YR12, YR14, YR16, YG63, YG67
coffee cup: C1, C3, E40, E41, YR12, YR14

Thanks (a latte) for stopping by! Have a fabulous weekend!

Tuesday, September 20, 2016

Mermaid to be...

Yes... I'm back with *another* mermaid card... are you tired of them yet? Yeah- me either! LOL- there's just so many fabulous little mermaids out there, I can't get enough of them!

I'm sharing today a card I made for the newest ANYTHING GOES challenge over on the Tiddly Inks Challenge blog!

I used this awesome Wryn the Mermaid digi...

Mermaid to be..

I kept my card simple to let her shine as the focus on the card. I blended some blues and aqua distress inks onto an embossed background and adhered her with foam tape. Added a sweet sentiment from The Greeting Farm onto a flag die by Creative Basics.

Copics: 
skin: E000, E00, E21, R20
hair: RV14, RV17, RV19
top: V12, V15
tail: B02, B05, G05, B37
stars: Y13, Y15, Y17

Hope to see you join in the Tiddly Inks fun! Check out the Challenge Blog for all the details- and more awesome inspiration from the rest of my Tiddly teammates!

Thanks for stopping by!

Saturday, September 17, 2016

You Are My Sunshine

Hello!

We're having some fun over on the Passionate Paper Creations & Friends Facebook page this weekend- Power Poppy is sponsoring a coloring contest, having a sale, and prizes!


For my card, I used the Sunshine of my Life digi... I just LOVE sunflowers, they scream fall to me (and well summer too, since that's when we have them growing in our garden)!

Sunshine of my Life

I die cut the sunflower image using the Fancy Rectangles & Layers die- luckily I sized my image just right! :) The sentiment that comes with the image is cut from a Basic Stitched Flag die. Mounted all of that onto an embossed card base using the Picnic Quilt embossing folder- EVERYTHING by Creative Basics!

The digi image set I used is apart of the current sale is a bundle pack- FIVE digis together for an outstanding price! Check it out here!


Copics: 
red sunflowers: R24, R46, E18, E19
yellow sunflowers: Y06, Y15, Y38, YR23
orange-y sunflowers: Y13, Y15, Y17, YR04
vase: C1, C3, R17, R37, R89

Hop on over to the Passionate Paper Creations & Friends Facebook Group and join if you're not already a member!

Thanks for stopping by... Happy Saturday!

Thursday, September 15, 2016

Blossom Girls

Hello!

I'm back on the LDRS Creative blog today sharing my latest project! I had been dying to color these sweet Blossom Girls since I first got them back in July and finally got the chance to now... BUT I couldn't decide on which one to use first, so what did I do???

I used all FOUR of course!!

Blossom Girls box 1

Blossom Girls box 2

I remembered having the template for this trapezoid box waaay back when- from an old Paper Crafts magazine.. dug it out and with some trial & error remembered how to make it again!

I colored each of the girls in their own style, but kept a similar color scheme overall... Each girl is also mounted with foam tape on top of a Stitched Flag die cut from Creative Basics. I also added a sentiment below each girl from this Amazing Girls sentiment set. And finally, added a thin wavy border (from this die cut) along with some lacy trim to finish off the top.

Here's a close up of each of the girls, along with the copic colors I used for each...

Jasmine:
Jasmine

skin: E000, E00, E11, R01, R22; hair: C3, 100; eyes, E35; clothes: BG11, BG13, BG15, Y06, Y15, Y38, W3, W5; purse: RV14, RV17, RV19, W3, W5

Blossom:
Blossom

skin: E00, E93, V12, R22; hair: E35, E37, E39, E29; eyes: E23; clothes: RV14, RV17, RV19

Daphne:
Daphne


skin: E000, E00, E21, R20, R22; hair: E25, E27, E29, YR23; eyes G21, G24; clothes: BG11, BG13, Y06, Y15, Y38, YR23, W3, W5; flowers: C0, C1, Y06, Y15.

Daisy:
Daisy

skin: E11, E33, E51, R22; hair: E44, E47, N9, YR23; eyes: B01, B05; clothes: BG10, BG11, BG13, BG15, RV14, RV17, RV19; Y06, Y15.

Thanks for stopping by!

Sunday, September 11, 2016

Waving Hello!!!

HELLO!!

I'm excited to be posting today because I'm guest designing at Butterfly Reflections, Ink blog this month!

With the start of September, (& Labor Day here in the states) it *usually* signifies the end of summer... but since I live in Arizona, and it's still HOT and likely will be for another month or two... (blech!) I thought mermaids would be appropriate!

I mean how can you now love these sweet Little Mermaids from The Greeting Farm! Nothing says summer like mermaids, right?

Waving Hello

To create my little underwater scene, I die cut a circle and used Distress Inks to blend together some watery colors (Salty Ocean, Mermaid Lagoon, Peacock Feathers, Tea Dye & a touch of Ground Espresso).  I colored the elements from the stamp set using Copic Markers-of course! Fussy cut them out and traced the outer edge in black. I played with the arrangement for a bit before I decided to adhere them to the circle and popped up a few using foam tape to add more dimension. I heat embossed the sentiment using white embossing powder with Versamark ink. Finally, I adhered the circle piece to my embossed card base (with this embossing folder), with craft foam, added some shimmer using a Spectrum Noir Sparkle pen in clear.

Here's a closer look to see the dimension and shimmer...
Close up mermaid

Copics: 
skin: E000, E00, E21, R20
hair: B16, B37, 100
star/bikini top: R32, R35
tail: B05, G05, B37
seaweed: BG11, BG13, BG15, BG49
fish: B14, B16, C1, C3, R32, R35, R37
castle: E31, E33, E35

Thanks for stopping by & I hope this gives you some inspiration to start off your week!